
To find the settings, go to: WooCommerce > Settings > Bulk Table Editor
Bulk Table Editor has two sections, the first section is for general settings and the other is for setting up integrations with other plugins.
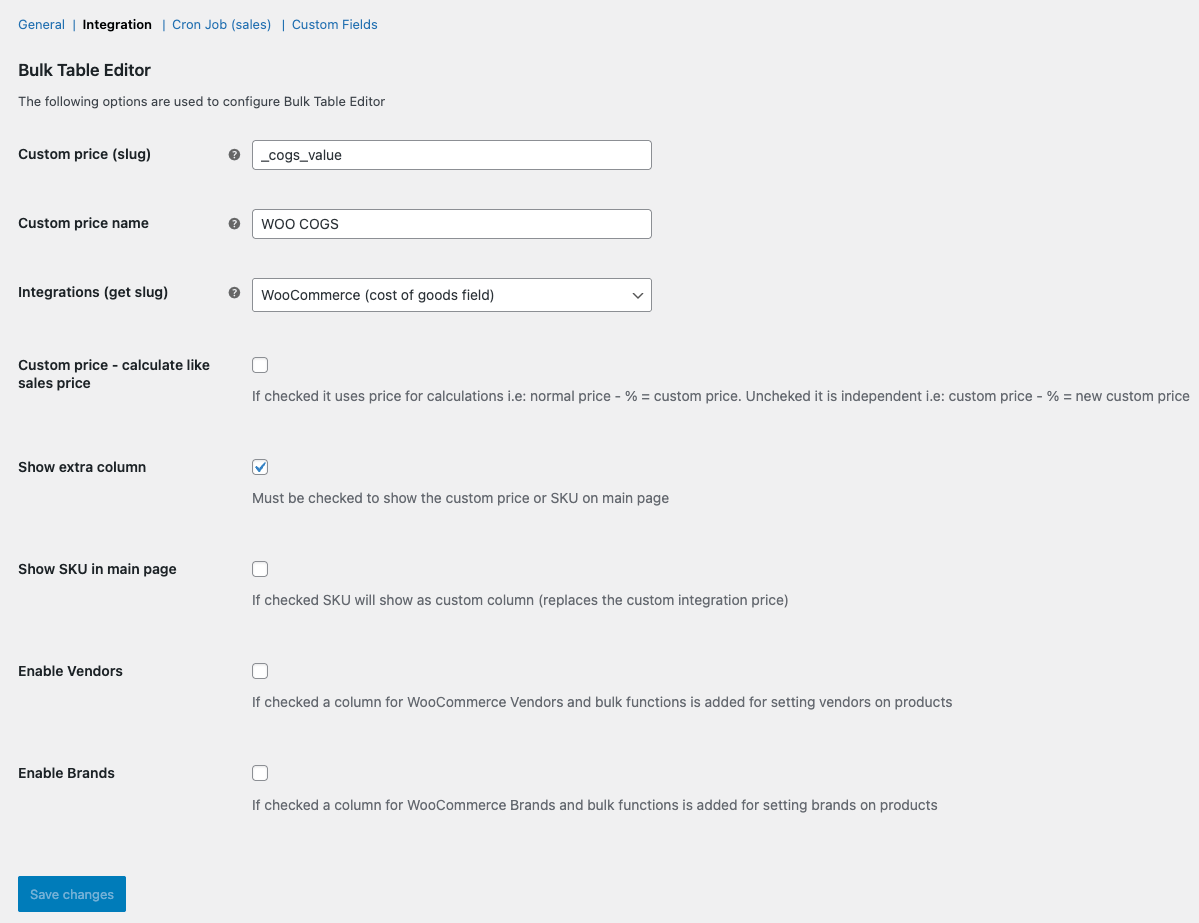
How to use the integration settings
- Custom price (slug): Use the price slug for i.e Cost of goods, Wholesaler, Name your price, MSRP or purchaser price. We recommend that this is a price field when it is treated like a number in the table. See the FAQ on how to find this slug or use the Integrations (get slug) dropdown box. (typically i.e _cost_of_goods)
- Custom price name: The custom column name in the table, recommended to keep it short as the table has limited size.
- Integrations (get slug): Use this select box to set the slug for Cost of goods (from Cost & Reports for WooCommerce), Cost of goods (for WooCommerce) Name your price or other approved integrations. Select one, the meta slug will be put in Custom price. Remember to set a custom name after using this dropdown select box i.e Cost of goods.
- WooCommerce COGS field is possible to use from vs 2.5.9 (need to add this in WooCommerce > Settings > Advanced too)
- Custom price – calculate like sales price: If checked it calculates using normal price like this example: normal price – 20% = custom price. Default (not checked) it calculates like this example: custom price – 20% = new custom price.
- Show extra column: Check this to see your custom price or SKU in Editor home.
- Show SKU in main page: This option shows SKU with the bulk functions in Editor home and replaces a custom price. Remember to check the option Show extra column if you use this option.
- Enable Vendors: Check this if you have the WooCommerce Vendors extension and like to bulk set Vendors in Bulk Table Editor